Monday, 27 October 2014
pixilation: finished film
Making a pixilation or film for that matter was a completely new experience and was a lot more challenging than i had anticipated. I tried to story board the film as best as I could so I knew exactly how I wanted each shot to look before shooting however setting up each shot took a lot longer than I thought it would. The hardest part I found during this short project was directing actors whilst filming, whilst story boards do show the basic movements/positions they need to do there were many smaller details I needed to get across to them. This was the first time I had to direct people acting, I found it difficult to remember all the points that were important to tell the actors whilst I was also trying to get the shot i wanted. I feel the next time I do something that requires acting again it would be good to note down all the important aspects of the shoot for both mine and the actors reference. I would also try and do more rehearsals of the film before shooting as I rushed into filming far too quickly. I also feel that I should take more time doing my pixilation for some of the motion shots I did not make the actor move a little then take a frame and repeat the process I would take a few continuous shots whilst the actor moved slowly. Doing this in parts of the film detracts from the quality of the pixilation and does not fit the style.
After filming I had to edit the footage which was also completely new. We'd been given a brief tutorial on how to use after effects however the methods used did not work effectively with my film as it was not one continuous film there were multiple takes of scenes in different places. Fortunately our creative in residence was at hand to help me edit he showed me how to use the basics of adobe: premiere which is editing software rather than post production software (after effects). Using premiere I was able to use the razor blade tool to cut up sections of my film to loop sections I wanted to be longer and remove sections of film that were bad takes. Premiere and other editing software is something I definitely want to work on further as my film was greatly improved with simple editing I'm sure in the future it could make a big difference to my work.
pixilation story boards
Before I made my pixilation I needed to story board what I wanted to do. Before story boarding I came up with a very rough idea for my pixilation, I then looked at good examples of pixilation to decide whether what I wanted to do could exploit the advantages of making a pixilation. Pixilation gives quite a jittery motion to a film but it does allow for some interesting effects without the use of post production software. I decided to use a box that could change into other things for my short as I thought it would be interesting to play with metamorphosis in my pixilation. After I decided what I wanted to do I wrote out the film describing how each scene would run. After writing it all out I made that into a story board thinking about all the shots/angles I could use that would enhance the film.

Once I'd finished my first storyboard I created a second one using A6 bits of card which was a neater version of the first with a few changes. I used separate pieces of paper for each shot as it allowed editing before I'd even begun to film. It meant I could swap around shots or even remove some completely and replace them with something better.
Once I was happy with my story boards I was ready to show them to anyone who would work on my pixilation and begin filming.
Photoshop: animating from scratch
First I tried animating a simple pendulum that breaks and turns into a bouncing ball. This was a good way to test drawing in photoshop and getting a feel for how best to animate at 12fps.
Once I'd got my bearing a bit with the software I decided to try and do something more interesting. By making the face the background i could animate the bouncing eye separately making my life much easier and the animation appear smoother.
After this I tried to animate using a background which I had drawn previously and manipulate the background to be part of the animation. This was a lot more challenging as there were many different elements to consider at one time. I found labeling all of my layers in photoshop really helpful to avoid confusion whilst switching between frames.
pendulum animation
In today studio session I animated a pendulum using special see through paper. This was a first and a very nice experience really enjoyed drawing the entire animation by hand. Similar technique to the flip books however can created a much neater animation. I then scanned in each frame and put the animation together on photoshop. For my next animation task (to create a short pose to pose animation I would like to use a similar technique but with something more complex as I it will be an interesting challenge.

.JPG)

Friday, 17 October 2014
Photoshop: animation tutorial
Then moved onto editing the images using levels to mask out any blemishes. We then were showed how to use the time line feature in photoshop and the tool used with that. The afternoon consisted of putting what we were taught into practice, I find this the most useful as without putting things into practice it is hard for me to learn them. That also means I need to practice what we did today more to reinforce what I learned.

Wednesday, 15 October 2014
Dslr induction
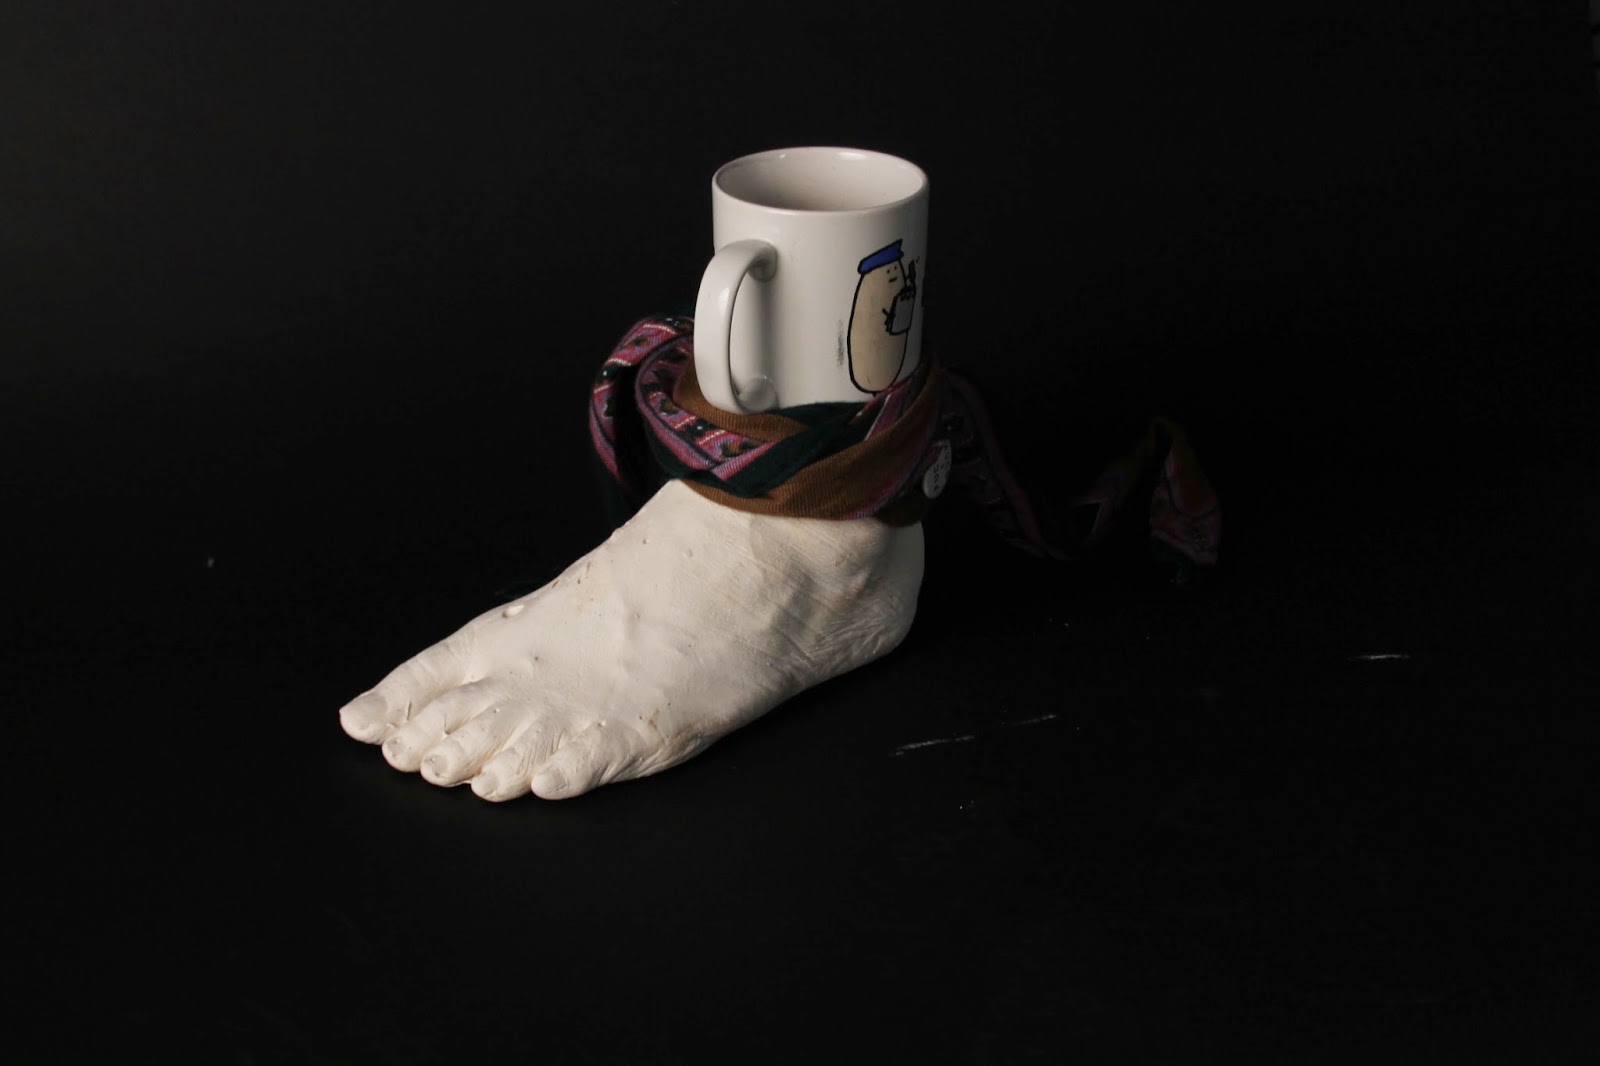
This afternoon I took part in a photography induction which showed us the basic in using a Dslr camera. The main points we covered were: resetting/formatting, using; aperture, shutter speed, iso and white balance. I'd used a Dslr previously during one of my foundation projects so I new about a lot of the points talked about however I had never used a canon camera before so I learned a lot about how to use them which was really useful. I really enjoyed experimenting with photography especially when I had been taught a few tools to play around with. Started by going around the college experimenting just with the aperture and the shutter speed (first four images). Then we all went into a studio to set up lighting rigs and black/white backgrounds to photograph object we brought in. This was an opportunity to experiment with lighting, tripod, aperture, shutter speed and white balance (last four images).
1st photo I increased the F stop slightly and used a very quick shutter speed to get the image dark but not too noisy.
2nd: I used a very slow shutter speed (around 1/4s) and moved the camera to get some motion blur
3rd: Used a fast shutter speed and a slightly lower F stop creating a darker photo with some depth of field
4th: I used the lowest F stop I could to get an exaggerated depth of field
5th: Testing using the lighting rigs
6th: Used a slightly slower shutter speed to get bit more detail whilst trying to not overexpose
7th: I used a low f stop and a fast shutter speed to try and get good depth of field
8th: Gif made up of a set of images with the shutter speed slowing down


Tuesday, 14 October 2014
12 priciples of animation and flip books
On mondays studio session we looked the 12 principles of animation and flip books. The 12 principles was a completely new concept to me and there was a lot to take in but a lot of the concepts within the subject were familiar. I feel to best way to learn about the 12 principles is by starting to look out for them more in animations I watch in future, as when we were showed an ice age clip containing an example of all 12 principles I found it very helpful in clearing up my understanding. Hopefully after a while most of the 12 principles will become second nature after studying them further so they require less thought when animating in the future.
After looking at the 12 principles the class were all given flip books to try animate the classic bouncing ball animation. This task mainly focused on 2 of the 12 principles Squash/stretch and timing. Squash and stretch were used to give the balls fall and bounce more fluidity. Timing was important to make the fall and rebound look realistic, if the ball took twice as long to fall than to rebound back up it would look very wrong. Before this I had made a few flip books but they were very simple and they were not very effective. It was good fun doing the flip books and I felt like I learnt a lot. In my opinion learning is easiest when its hands on rather than from a text book. The main problem I ran into whilst making one of my flip books was my animation sometimes looked ridged, this was caused by using straight lines instead of using arcs (one of the 12 principles). It was good making that mistake as that will stick in my mind in future if I encounter a similar problem.


After looking at the 12 principles the class were all given flip books to try animate the classic bouncing ball animation. This task mainly focused on 2 of the 12 principles Squash/stretch and timing. Squash and stretch were used to give the balls fall and bounce more fluidity. Timing was important to make the fall and rebound look realistic, if the ball took twice as long to fall than to rebound back up it would look very wrong. Before this I had made a few flip books but they were very simple and they were not very effective. It was good fun doing the flip books and I felt like I learnt a lot. In my opinion learning is easiest when its hands on rather than from a text book. The main problem I ran into whilst making one of my flip books was my animation sometimes looked ridged, this was caused by using straight lines instead of using arcs (one of the 12 principles). It was good making that mistake as that will stick in my mind in future if I encounter a similar problem.
Finished Storyboard
These are my finished storyboards for the nursery rhyme "Ring Around the Roses" made a few shot framing adjustments compared to my plan to try and make it more exciting and also make it flow better. I also tried to focus more on the lighting compared to my draft which I got some good feedback for. Some of the feedback said more written directions would be useful so next time I make a storyboard I will bare that in mind. I was also told that some of the frames looked a little flat due to not enough contrast in light between certain characters, for future storyboards I plan to touch them up in photoshop correcting contrast, lighting, colour balances and even neatening it up as a whole.


photoshop
This morning we had our first tutorial in the basics of photoshop. This was a really useful start for me as I had little photoshop experience before this morning so I have learnt a lot already. We learned how to create new files, how to approach sizing/resolution, layer images on top of each other as well as the basics on the brush tool and eraser tool. The session has opened my eyes to the simplicity of photoshop and how useful it will be however also that mistakes are incredibly easy to make. I have been taking notes on all the control/tool commands used so far and I aim to try and learn them for future use.
In the afternoon we elaborated on what we learnt in the morning. The main skill we learned to use was using layer masks. They allowed us to cut out of one layer to reveal the layer underneath but without deleting the top layer. This allows for easy mistake correction and a much more seamless professional looking image. At first it all seemed rather confusing but like most things after practicing it started to make a lot more sense and my methodology (slowly) sped up. Im excited to take digital software further over the next year, having my first induction dissolved my previous reservations/ignorance towards creating digital art.
The top image is my first photoshop attempt from the morning using just layering and erasing.
The bottom image is my afternoon sessions work using layer masks and colour/light editing.
Sunday, 12 October 2014
Adventure time storyboard
This is a storyboard by Pendleton Ward creator of adventure time. The storyboard is very simplistic but unlike all the other ones I've looked at this is for a long running TV show, this could mean that Ward has a level of confidence built over time that allowed him to trust other people to fill in the details missing from the storyboard. Although this storyboard lacks detail it is still very clear how the story will flow and the important shots to establish the story are all there. Ward has clearly thought out how to translate his ideas through a storyboard simply to his colleges in a very efficient manor.

Storyboard by: Pendleton Ward. Image from: http://www.nerdist.com/2014/10/look-at-these-adventure-time-storyboards-because-i-dont-know/
Storyboard by: Pendleton Ward. Image from: http://www.nerdist.com/2014/10/look-at-these-adventure-time-storyboards-because-i-dont-know/
Saturday, 11 October 2014
Nick park storyboard

The first thing I noticed about this story board was how incredibly clear and easy to follow it was. It translates almost perfectly to the film they look like stills from it rather than drawings from before it was made. Shows Nick Park had very clearly thought through everything before it was shot, since everything takes so long to shoot doing stop motion (especially at this quality) there is very little room for error. This fact is very relevant to the work i'll be doing in future as shooting/creating all forms of animation are lengthy processes planning everything down to small details is very important as mistakes are will be extremely time consuming.
Storyboards by Nick Park. Images scanned from:
Day Of the Dead Story Board
 This is a storyboard from George A Romero's zombie horror day of the dead. I found this story board incredibly interesting for two reasons the first being that the drawing style of the story board matches this film really well. The dark and sketchy style will give all the people working on the film an idea of the tone that should be worked towards. Although a sketchy and dark style is used for this storyboard it is still very clear the shots shown in each frame are very defined.
 The second reason I found the storyboard interesting is that it reminded me of the drawing of the comic book series "the walking dead". The same black and white sketchy dark style is used throughout the comic book series. The comic was first published 18 years after the release of Day of The Dead. It is likely that George A Romero's works influenced this comic book but also shows how well translated the storyboards are considering the styles between the storyboards and the comic are similar.
The storyboards are from George A Romero's: Day Of The Dead and scanned from
Comic is The walking Dead, Written by Robert Kirkman and drawn by Charlie Adlard. Image from: http://walkingdead.wikia.com/wiki/File:The_Walking_Dead_Comic_-_Zombie_City.jpg
Old Boy story board
This is a storyboard from Chan-wook Park's Old Boy a thriller from 2003. This storyboard compared to a few of the others I have looked at has a much messier and harder to follow style to it however in context to the corresponding scene in the film it makes perfect sense. This action sequence in the film is one man fighting his way through a group with a hammer, its a very intense scene but also has a messiness to it that conveys the sheer madness/rage of the main character. The storyboard indicates this really well also. After drawing this conclusion it made me fully realise the importance of the style/feel of a storyboard. Getting the right style/feel you want in your film must come through in the storyboard so everyone who is working on it can not only get the technical aspects you want (shots/transitions etc) but also the right personal touches from everyone that are harder to command verbally or via text that can make a film great.

Miyazaki's Story Board


The storyboards have been scanned from the book: The Art of Howl's Moving Castle by Hayao Miyazaki
Wednesday, 8 October 2014
First taste of story boarding
Today I had my first lesson on what is and how to make an effective story board. There was a large amount of information that came my why and I have had very little experience with story boarding previously so most of todays information was completely new to me. We all (as a class) had to create story boards between 12-18 slides for an animation of a nursery rhyme. I found this task much more challenging than I thought I would as there was so much to think about. This was the first time I'd ever had to properly think about camera angles, transitions between shots and how they effected what I was trying to communicate. Some feedback suggested that my shots were a little dull, which I agree with looking back at my work. For the redraft of our story boards I plan to try and think more about approaching shots from different angles (eg. from above or below the character) instead of boring dead on shots, as different angles can convey completely different moods and tones to my audience.


Subscribe to:
Comments (Atom)